Segmented off centre vase – Phil Bristow
Hi all Reader’s
I wanted to try something different. The club had demonstrated a few times off-centre turning and I felt brave enough to give it a try. Not thinking to start with a simple project, my mind raced with fancy ideas. I thought I would try and make a vase/hollow form by creating 2 off centre bowls and glueing them together. Below are my general pointers of how this “turned” out.

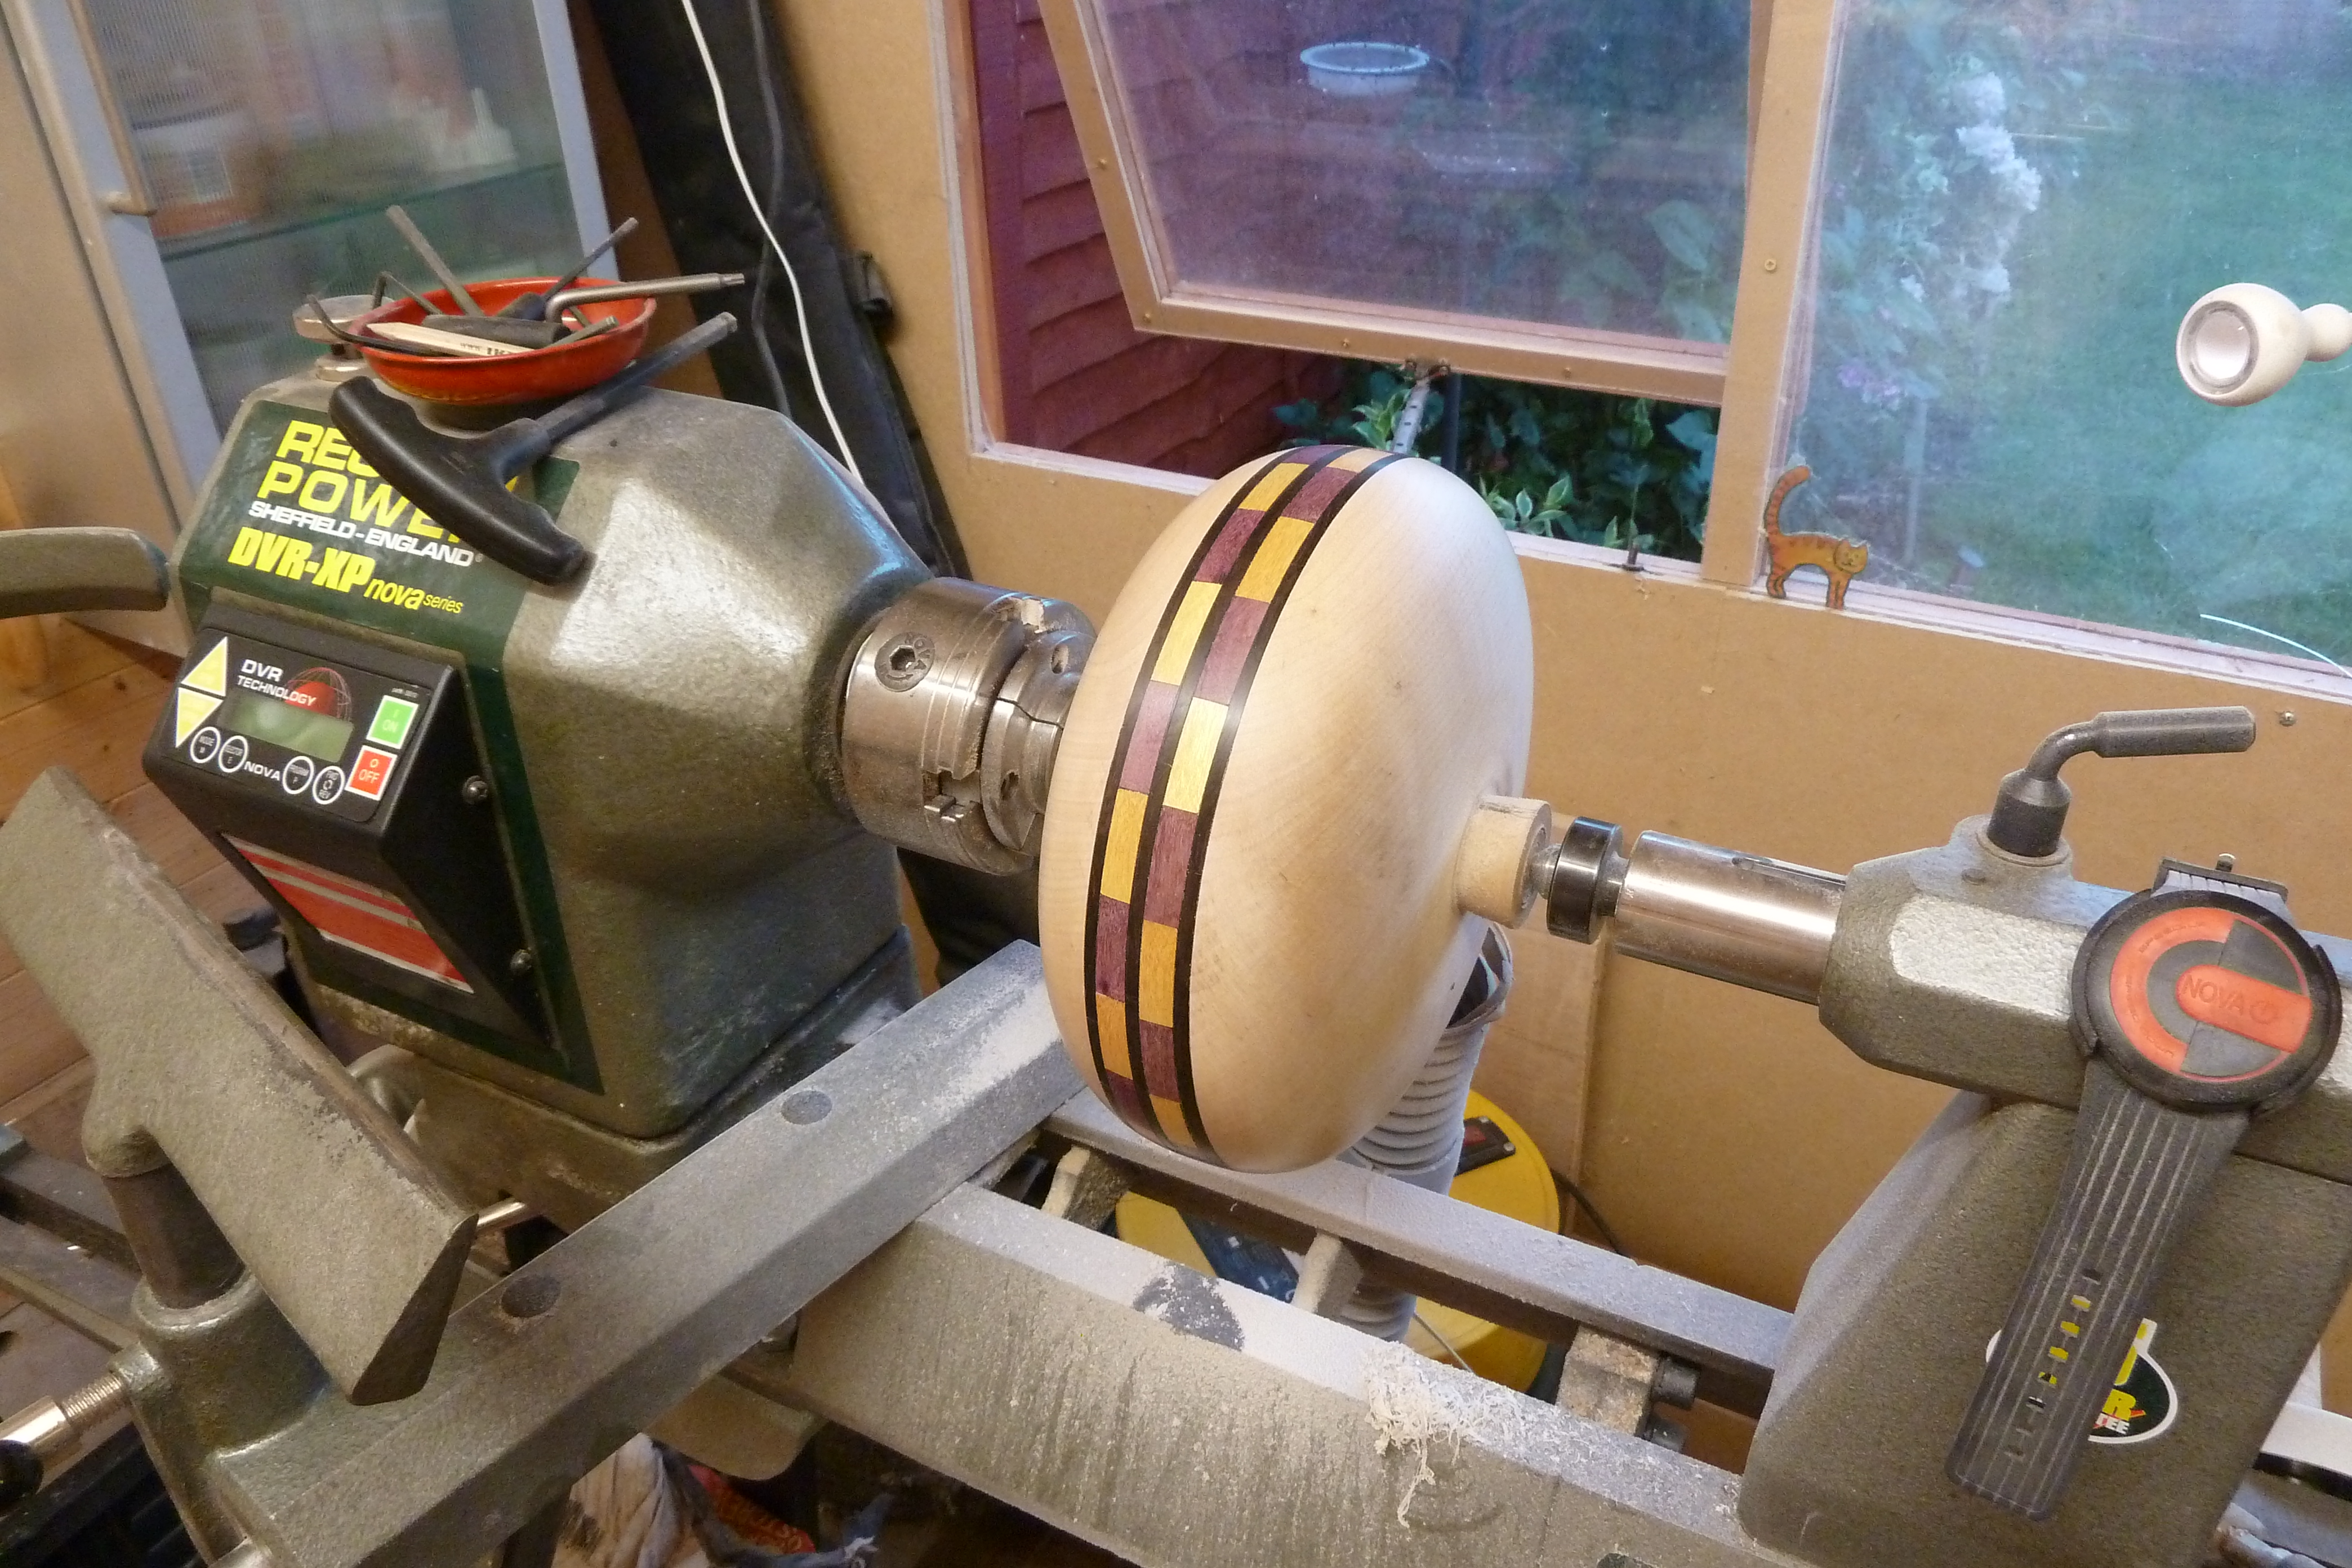
The project involves creating 2 identical off centre bowls. I used scyamore for the main bowls with a segmented trim of purpleheart, lemonwood and blackwood to hide the join. Sizes of the bowls aren’t really inportant – just that they are the same. I believe the bowl blanks were 12x3inchs.
get the outside diameter of each bowl the same. The second hole was drilled an inch off centre – this was to create the off-centre inside – remember both bowl blank must have exactly (not nearly) the same distance between the holes – this is the first measurement that is critical.
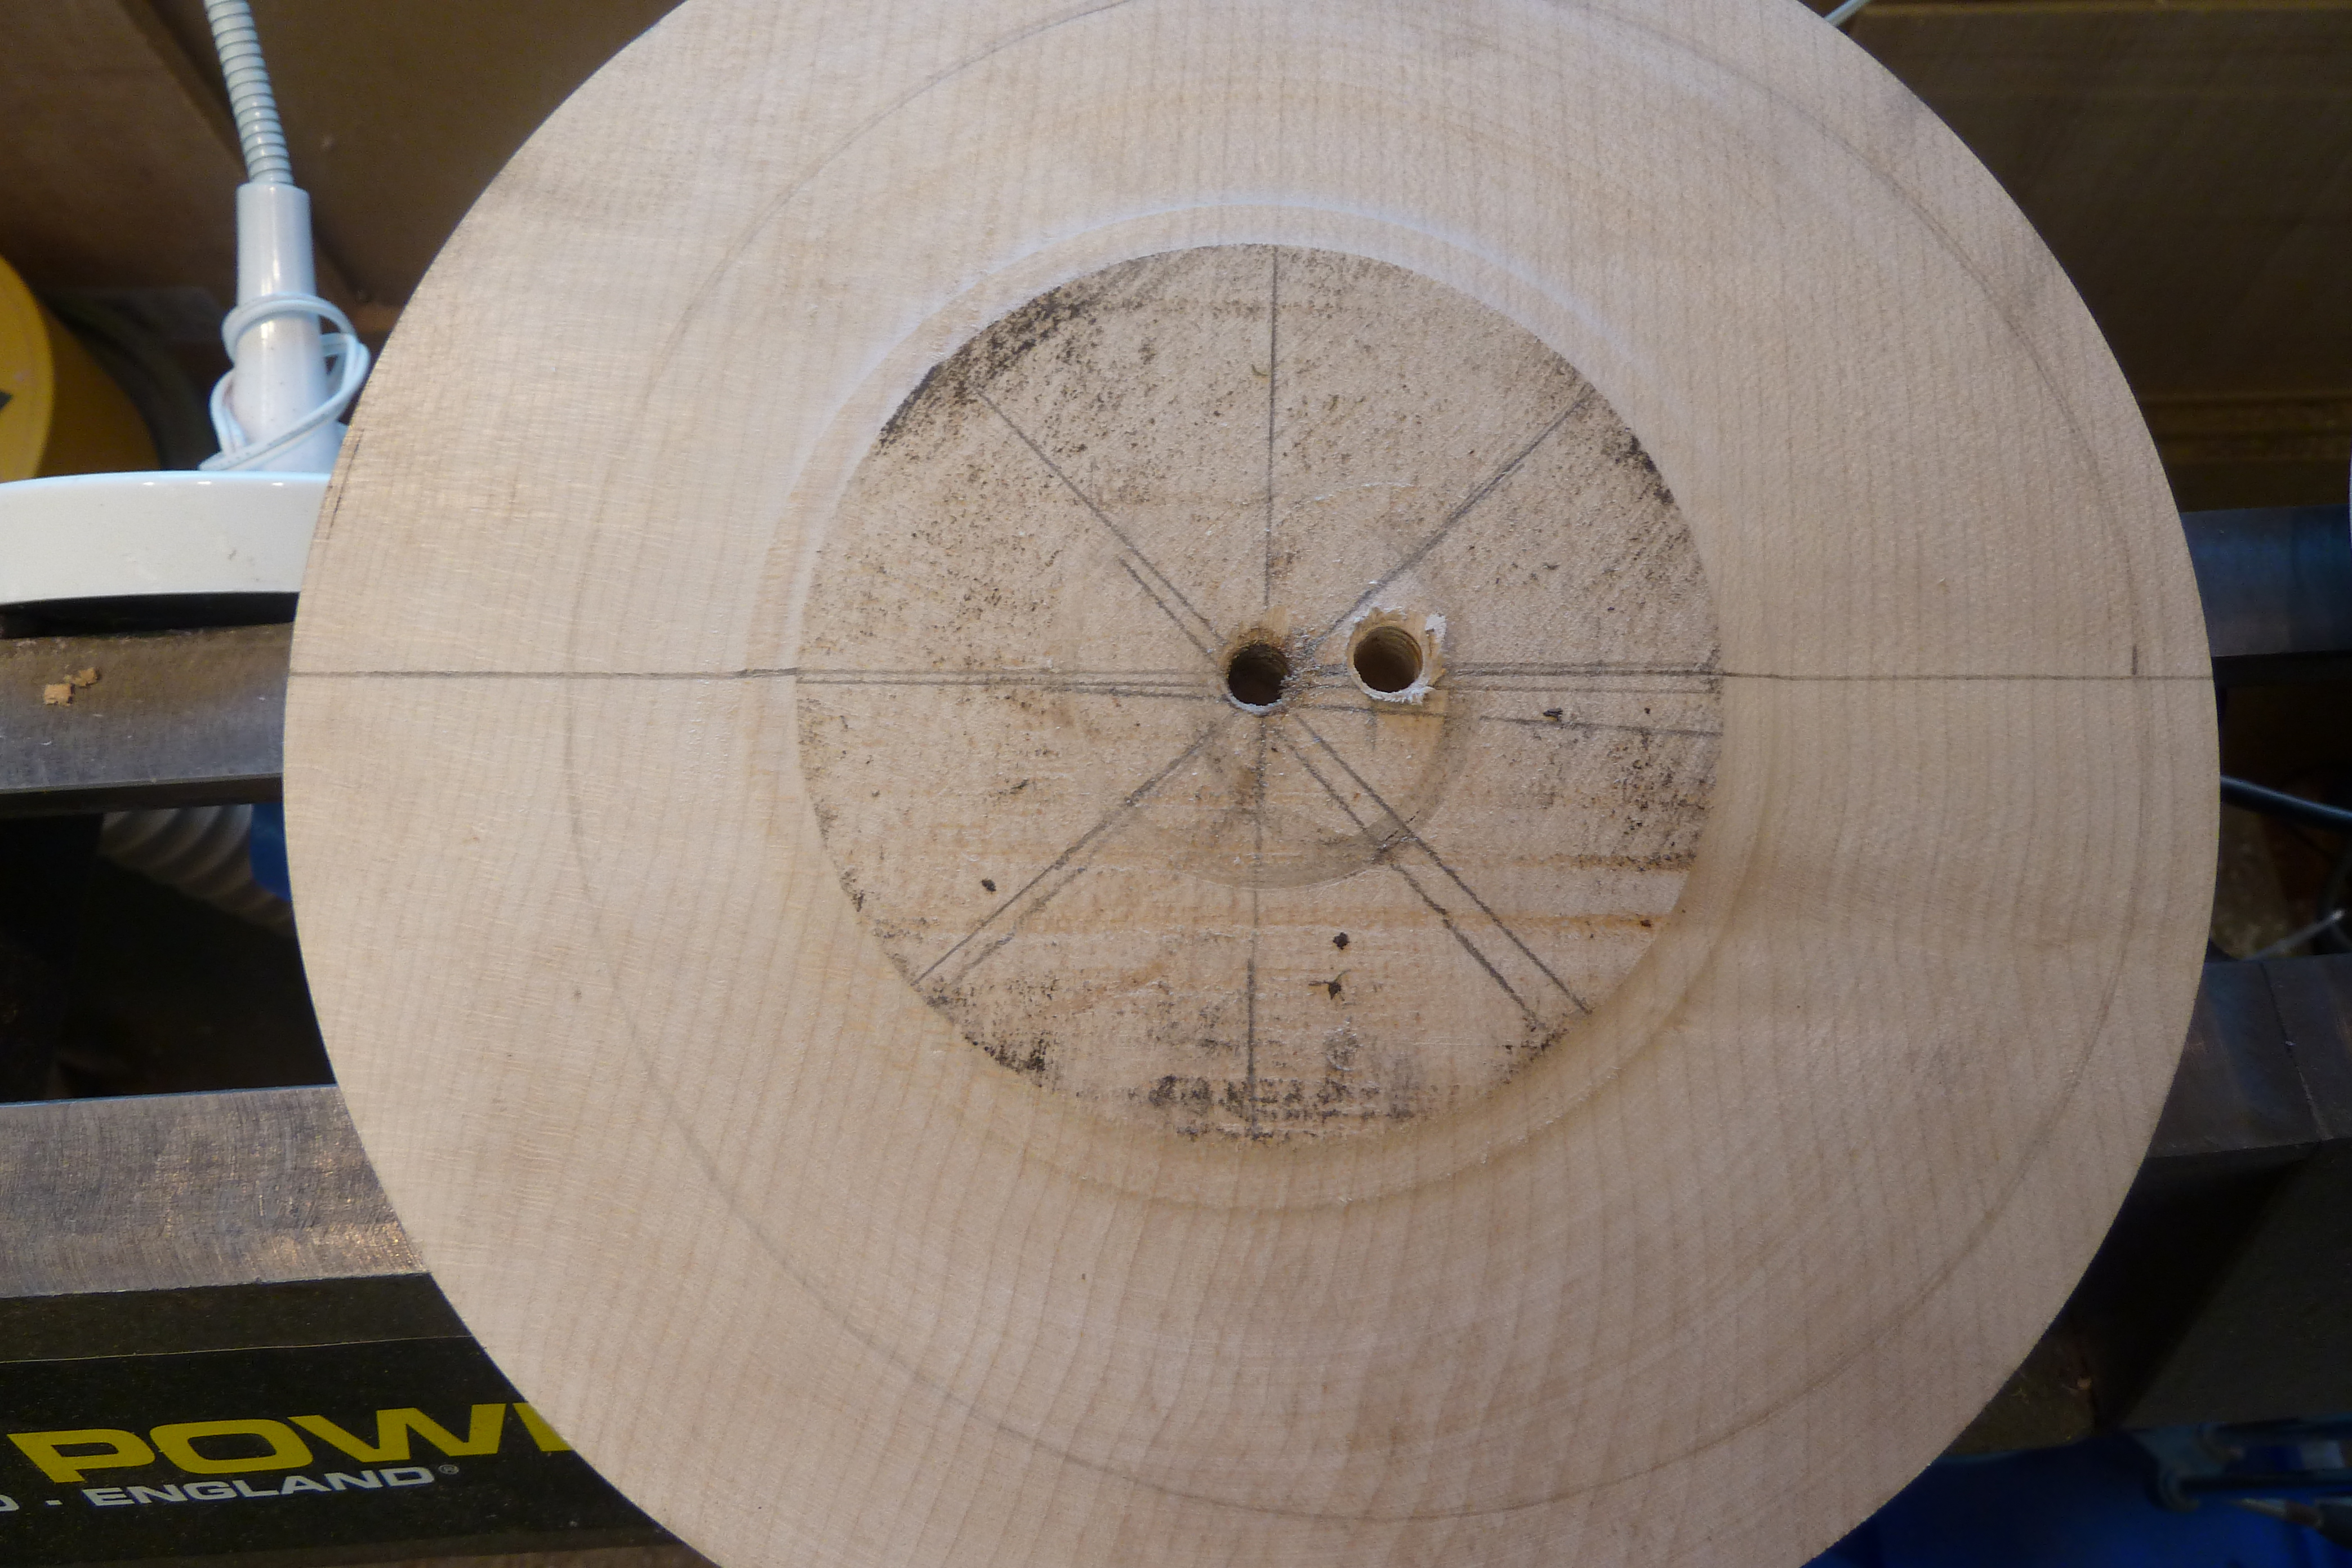
Once the holes were drilled, I used the centre hole to true up each blank to exactly the same diameters (size doesn’t matter – just that they are the same diameter and depth). Then I used the off centre hole – inserting it onto the screw chuck I marked the off-centre centre on the other side of the blank. This was to enable me to glue a chucking point/spigot on the “bottom” of each bowl (I did not want to lose any depth in each bowl). Once the glue had set I turned the spigots to a nice round size that fitted into the jaws of my chuck.

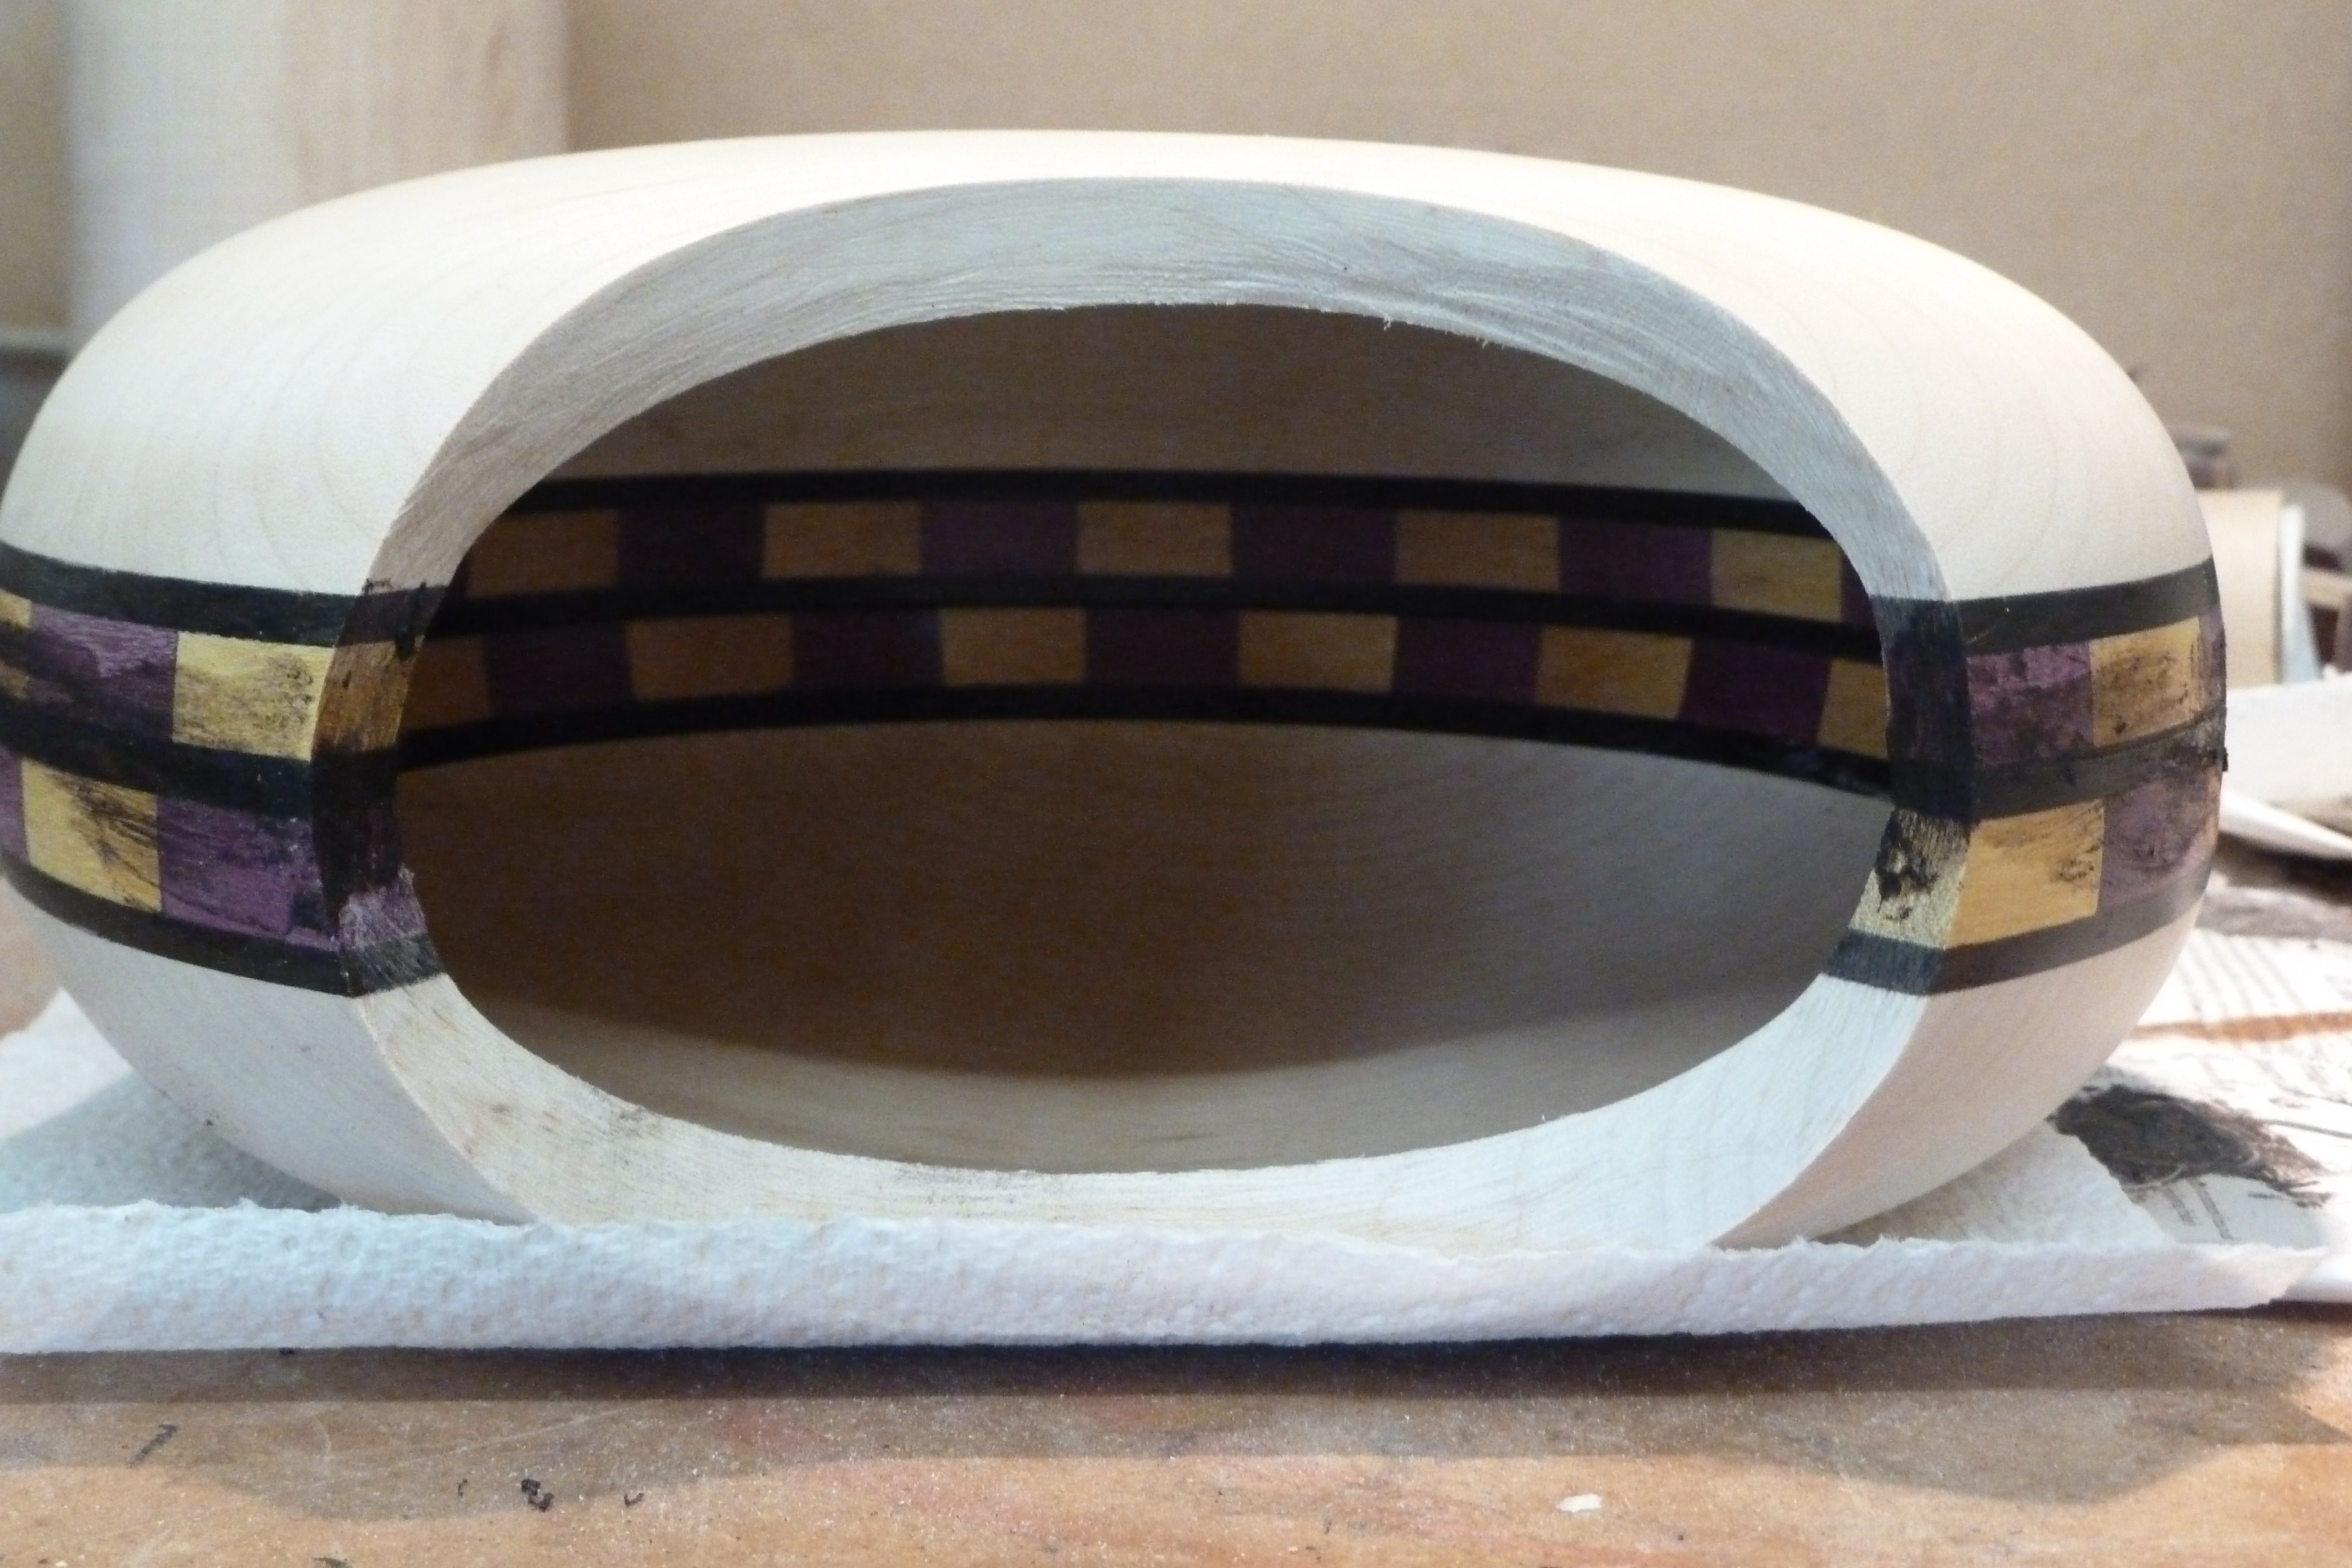
Once this was done I was able to reverse the bowls and focus on the inside. Before I started to hollow out the inside of the bowls, I wanted to creat the segmented rims. This was so the line of the inside of the bowl would be seamless when cutting it out later. As you can see from the picture below, you need to think of the final inside space and cut the segments accordingly to cover the bowl wall. I simply drew the inside diameter of the bowl with a pencil when it was on the lathe. I built up a layer of blackwood, then purpleheart/lemonwod and then a final layer of blackwood on each bowl. As the final form is going to have the 2 bowls glued together you must remember to offset/reverse the sequence of the purpleheart/lemonwood on each bowl to achieve the checkered effect. Also use where the segments join to mark the “top” of the bowls where the wall thickness is going to be at it’s thinnest. Draw a line between the 2 screw chuck holes to ensure you know where that is.

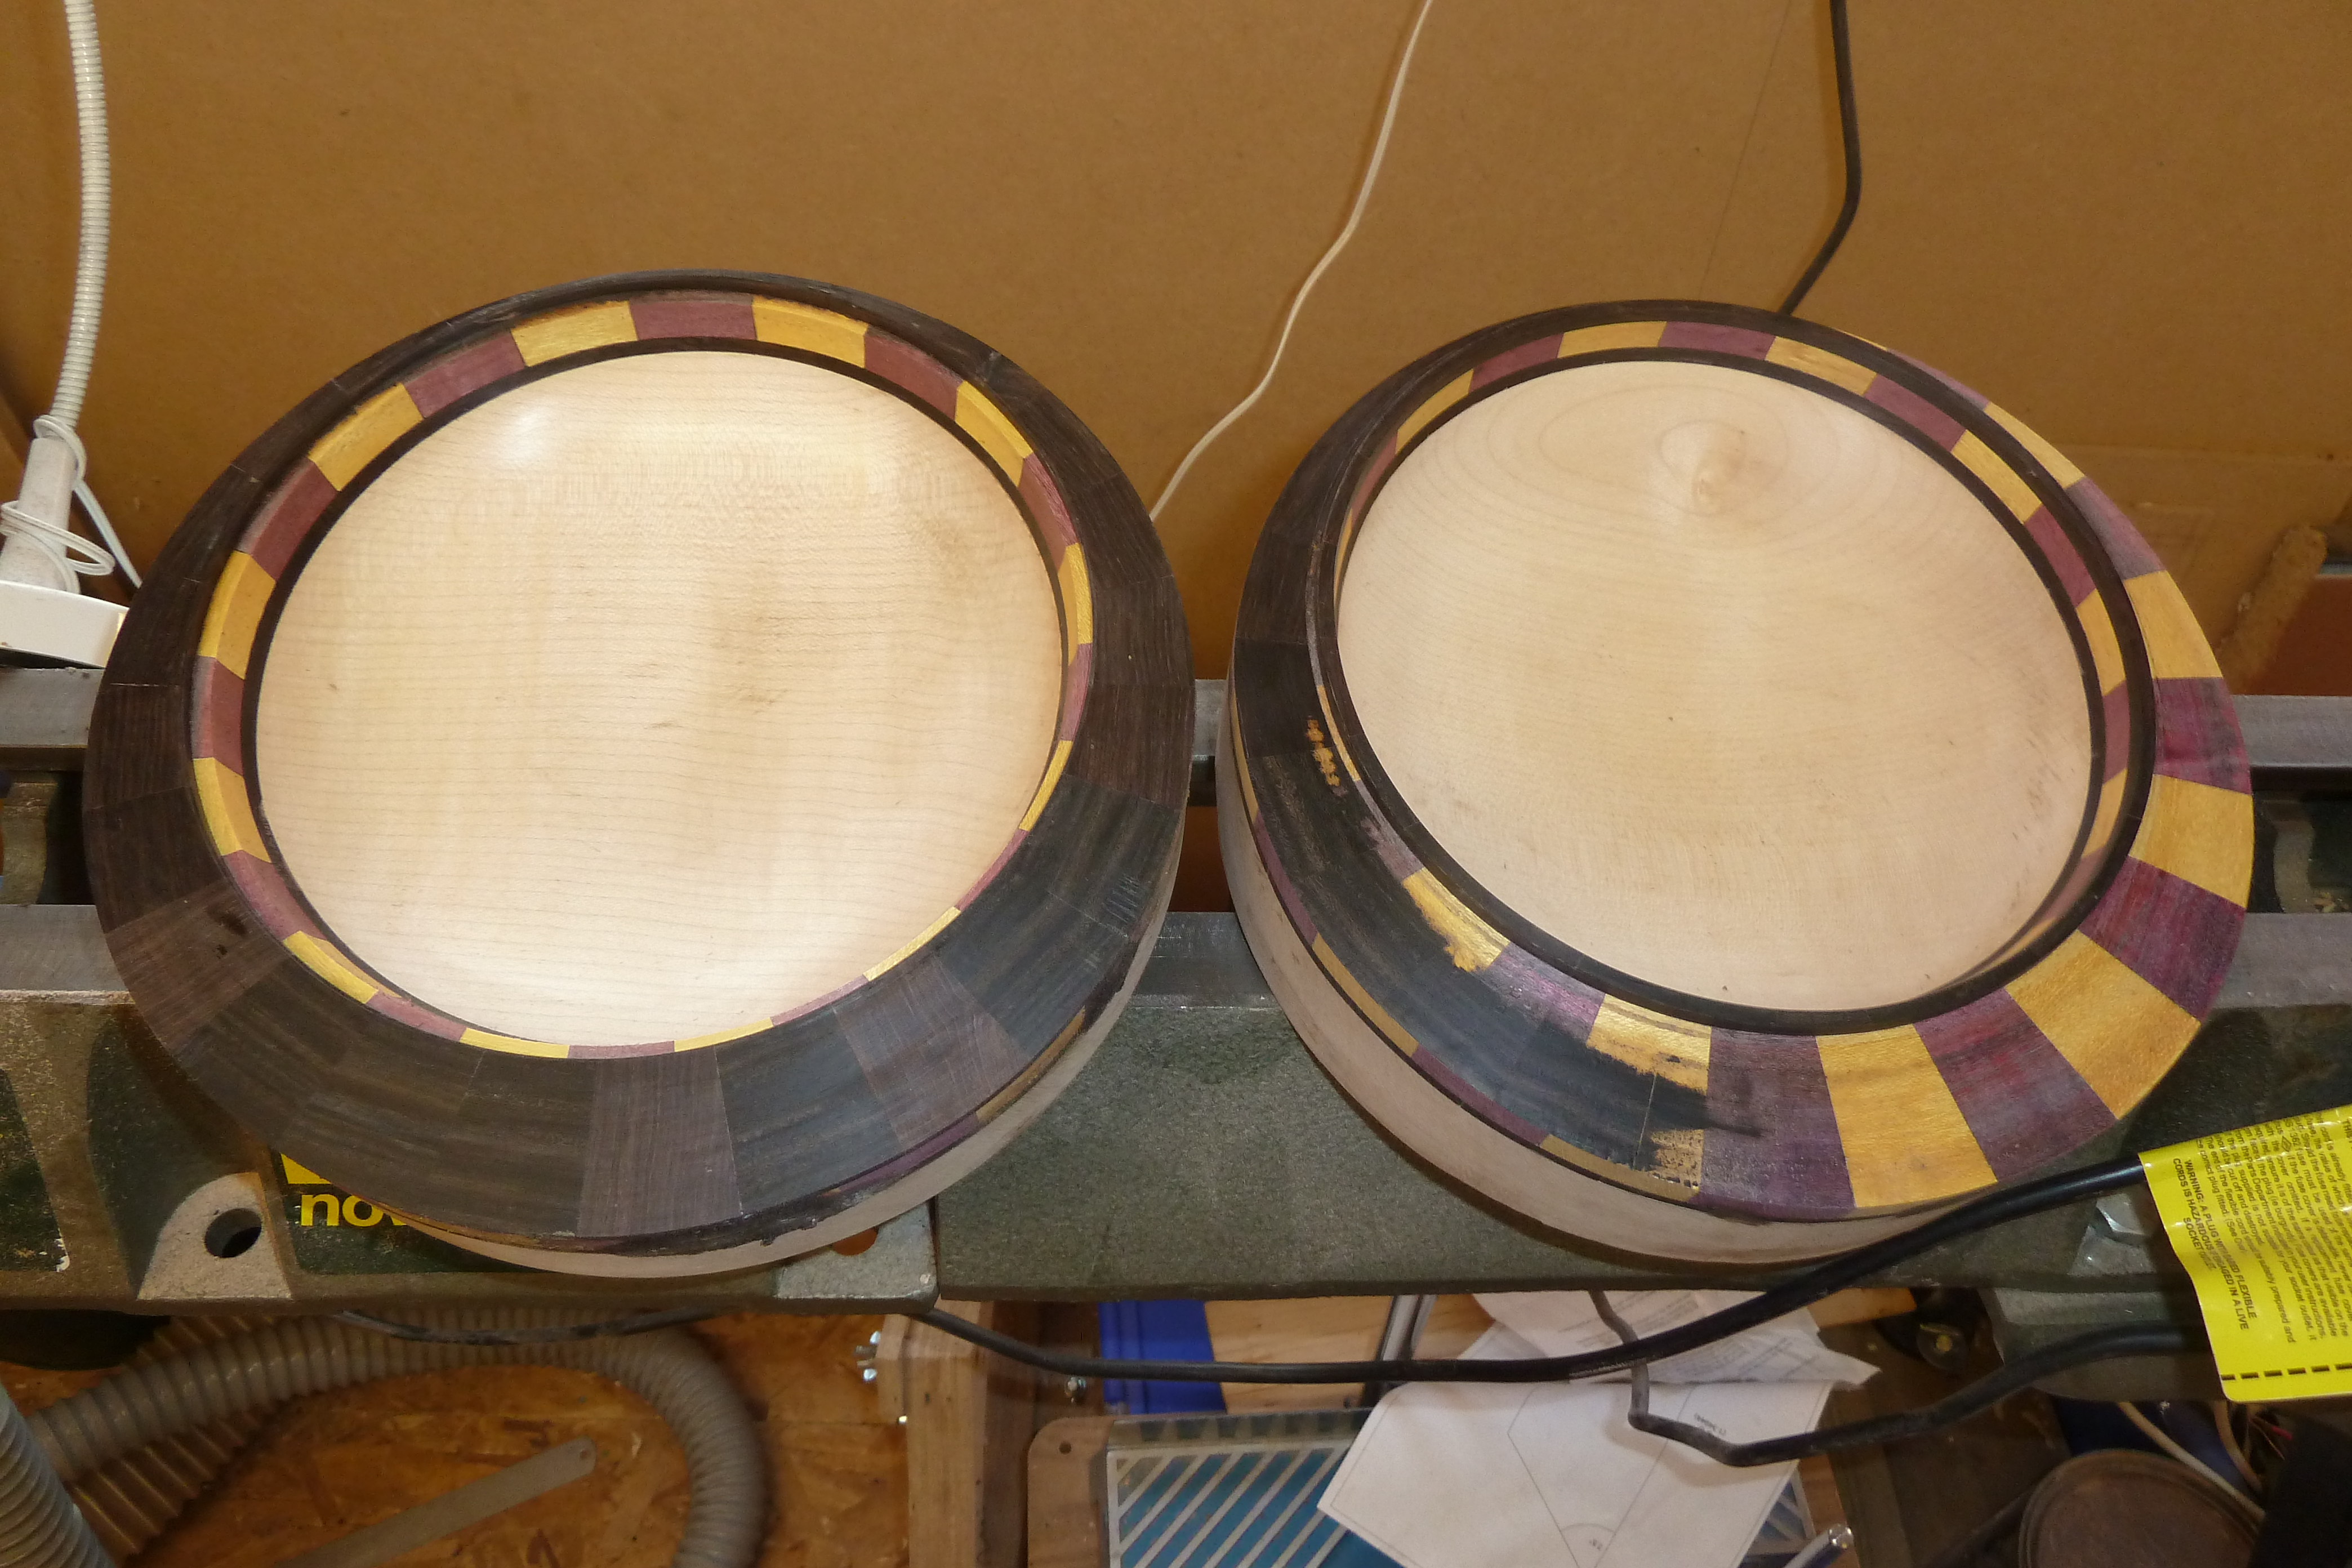


Now the top segmented layer of blackwood on each bowl is going to create/concel the lip that joins the bowls together. You need to mount the bowl blank back on the off-centre centre and cutaway an internal lip on one bowl and an external lip on the other. Best explained in the pictures below (note – I saved the blackwood shavings for later – you will see – read on):
Check the bowls perfect slot together – there must not be any wiggle in the join so it is best to take very small cuts in the lips and try multiple times of testing the fit to get it right. Once both bowls slot together using the blackwood rim. You can start hollowing out the inside of the bowl. The cut of the wall going through the segments must be at 90 degrees to the face to ensure the angles are the same. The depth must also be the same. I used a template of the cross section of the first bowl to ensure the second was identical. Once the offcentre inside of the bowl is complete, you must sand and finish the inside at this stage as you will not get a chance later. So sand back to about 320 grit, seal and wax (that is what i used, but use whatever finish you want).
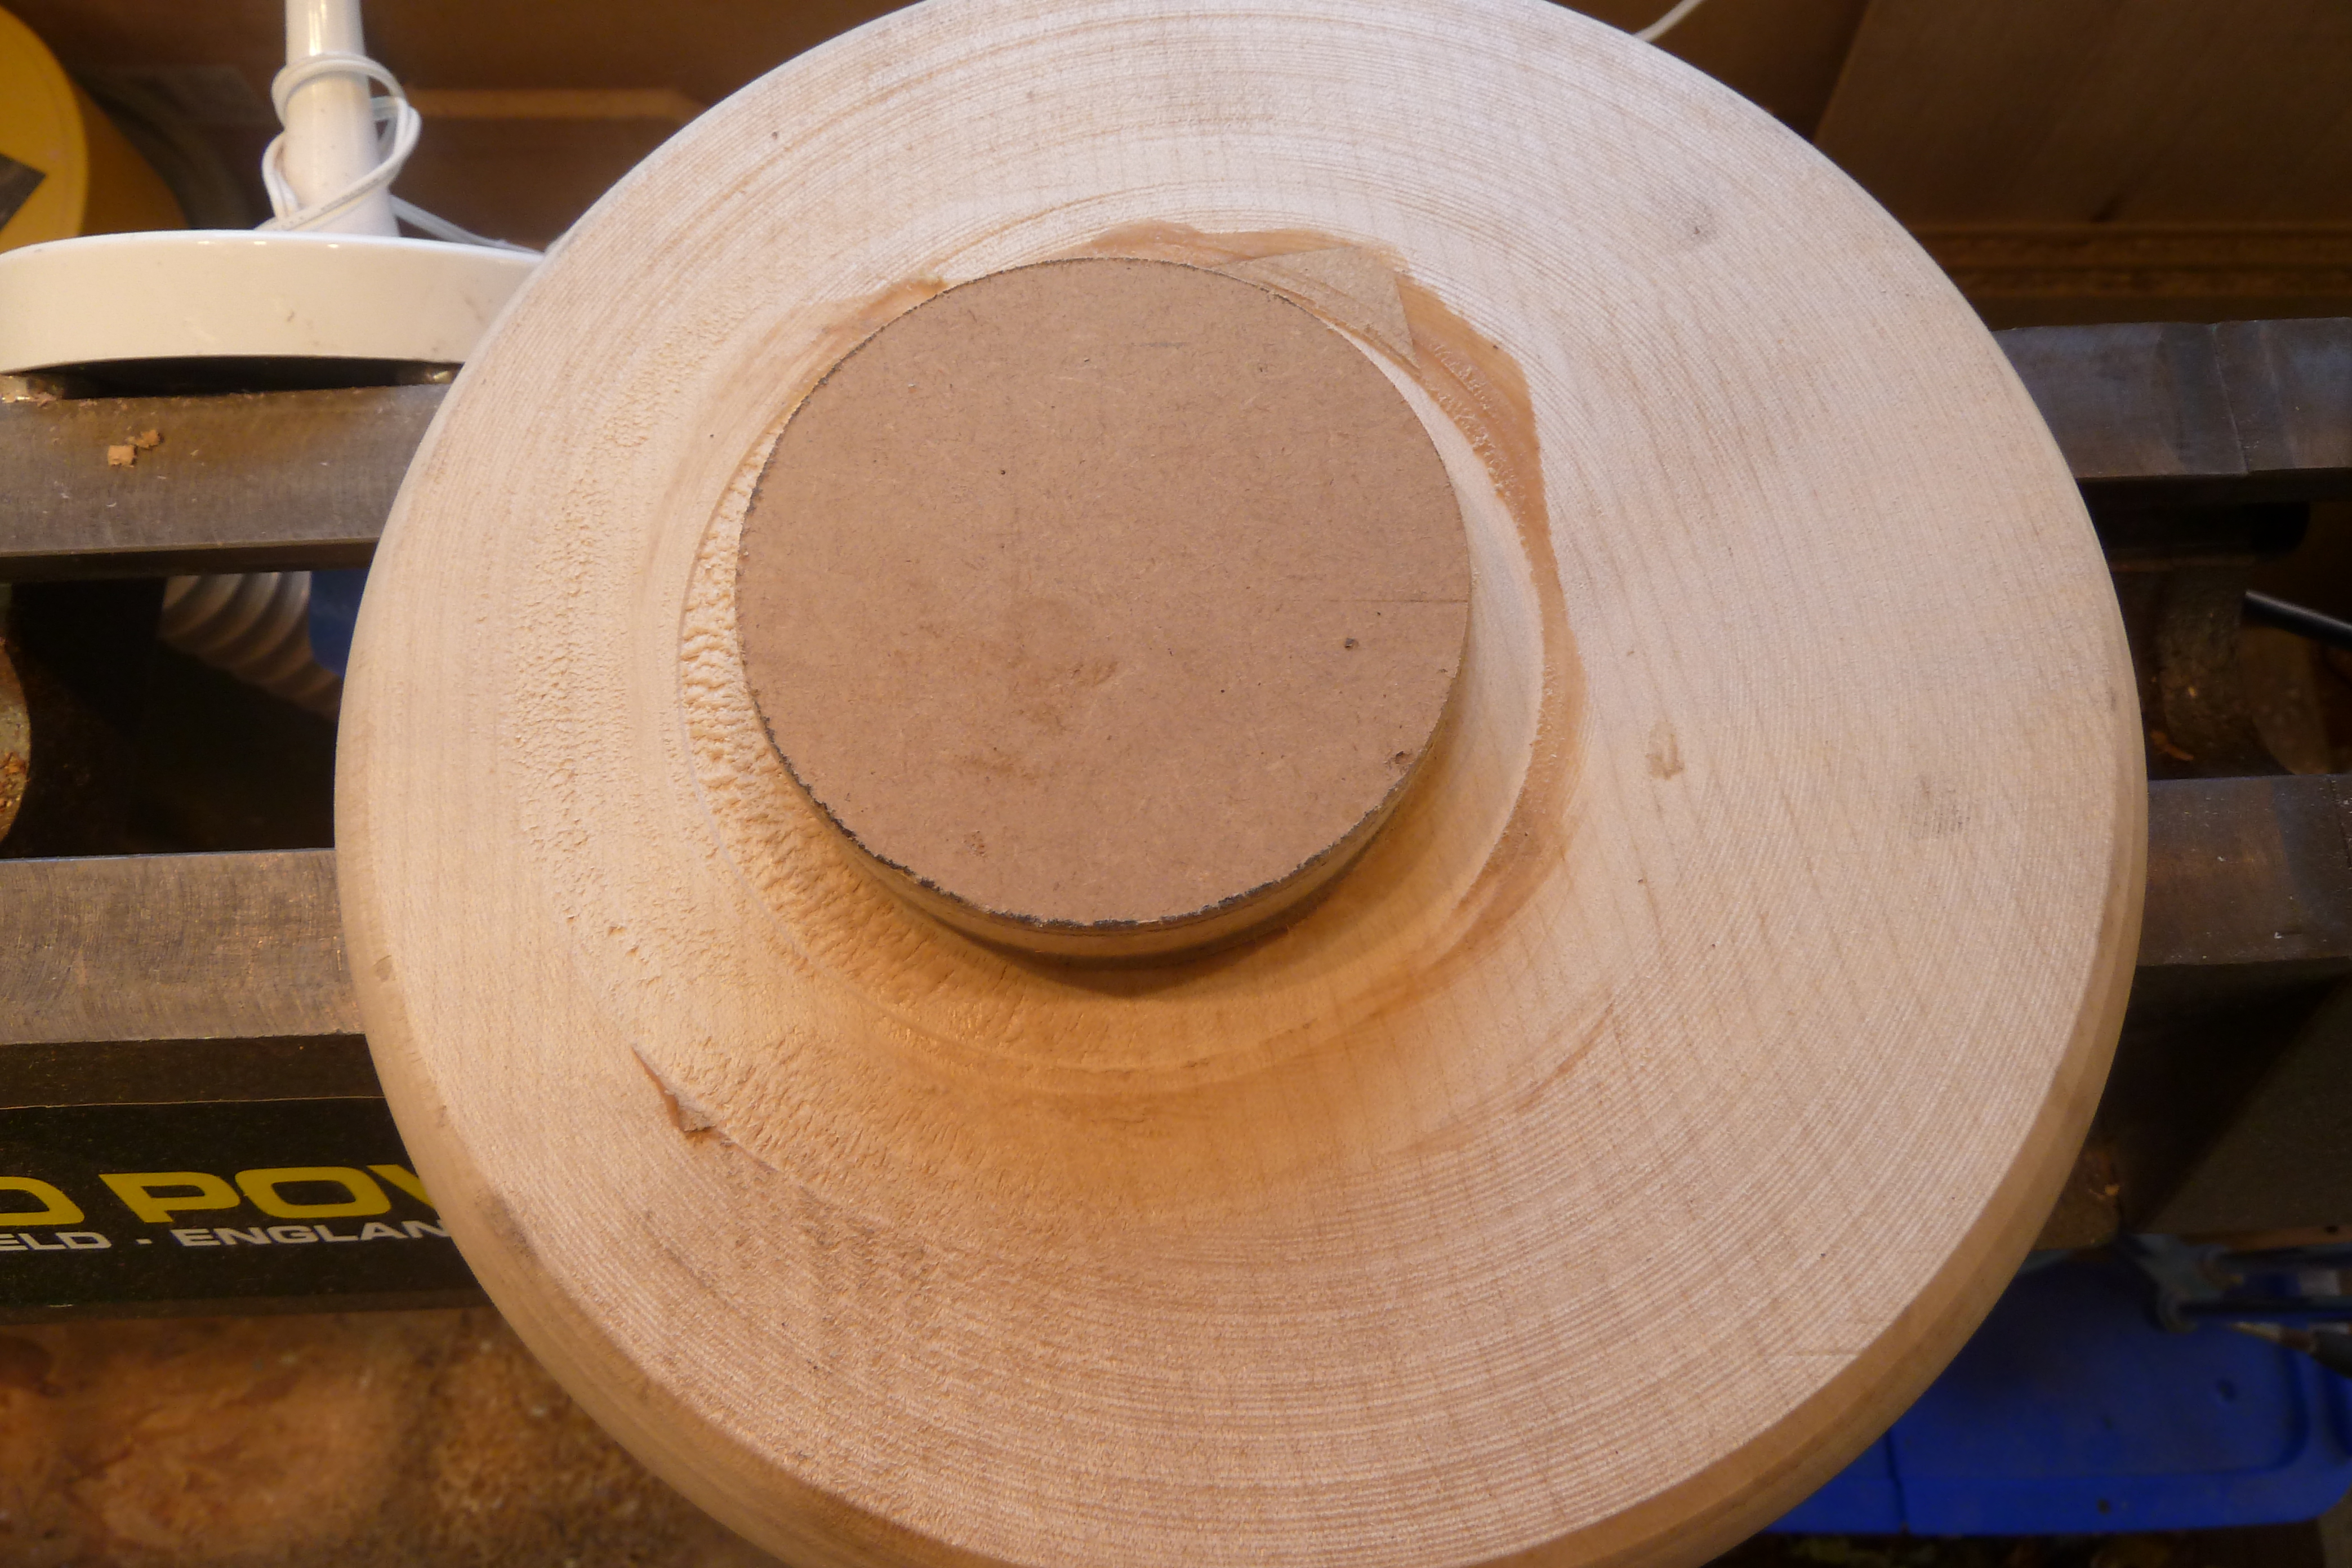
Once the finishing is complete you now need to focus on the outside of the bowls/form. I mounted the bowls onto a set of button jaws. I then re-turned the glued on spigots to hold the bowl on the centre.

Once that was done I mounted both bowls onto the lathe in their final configuration. You must ensure the “top” or thinnest part of each bowl is aligned to ensure the bowls are symetrical. Also note the thickness of the bowl wall at the thinnest point. You will need to ensure you do not cut away too much of the external diameter of the bowls in the shaping.
Again both external bowl shapes but be identical. So I used a template based on the first bowl to shape the second bowl – same idea/process as used in making the shape of the inside bowl. Once the external shapes of the bowls are the same and the join between them is seamless, I sanded the form down to 320 grit on all the outer part of the bowl. Then mounted each bowl back on the button jaws and cut away the glued on spigot. and sanded the last piece of the bowl where the spigot was.
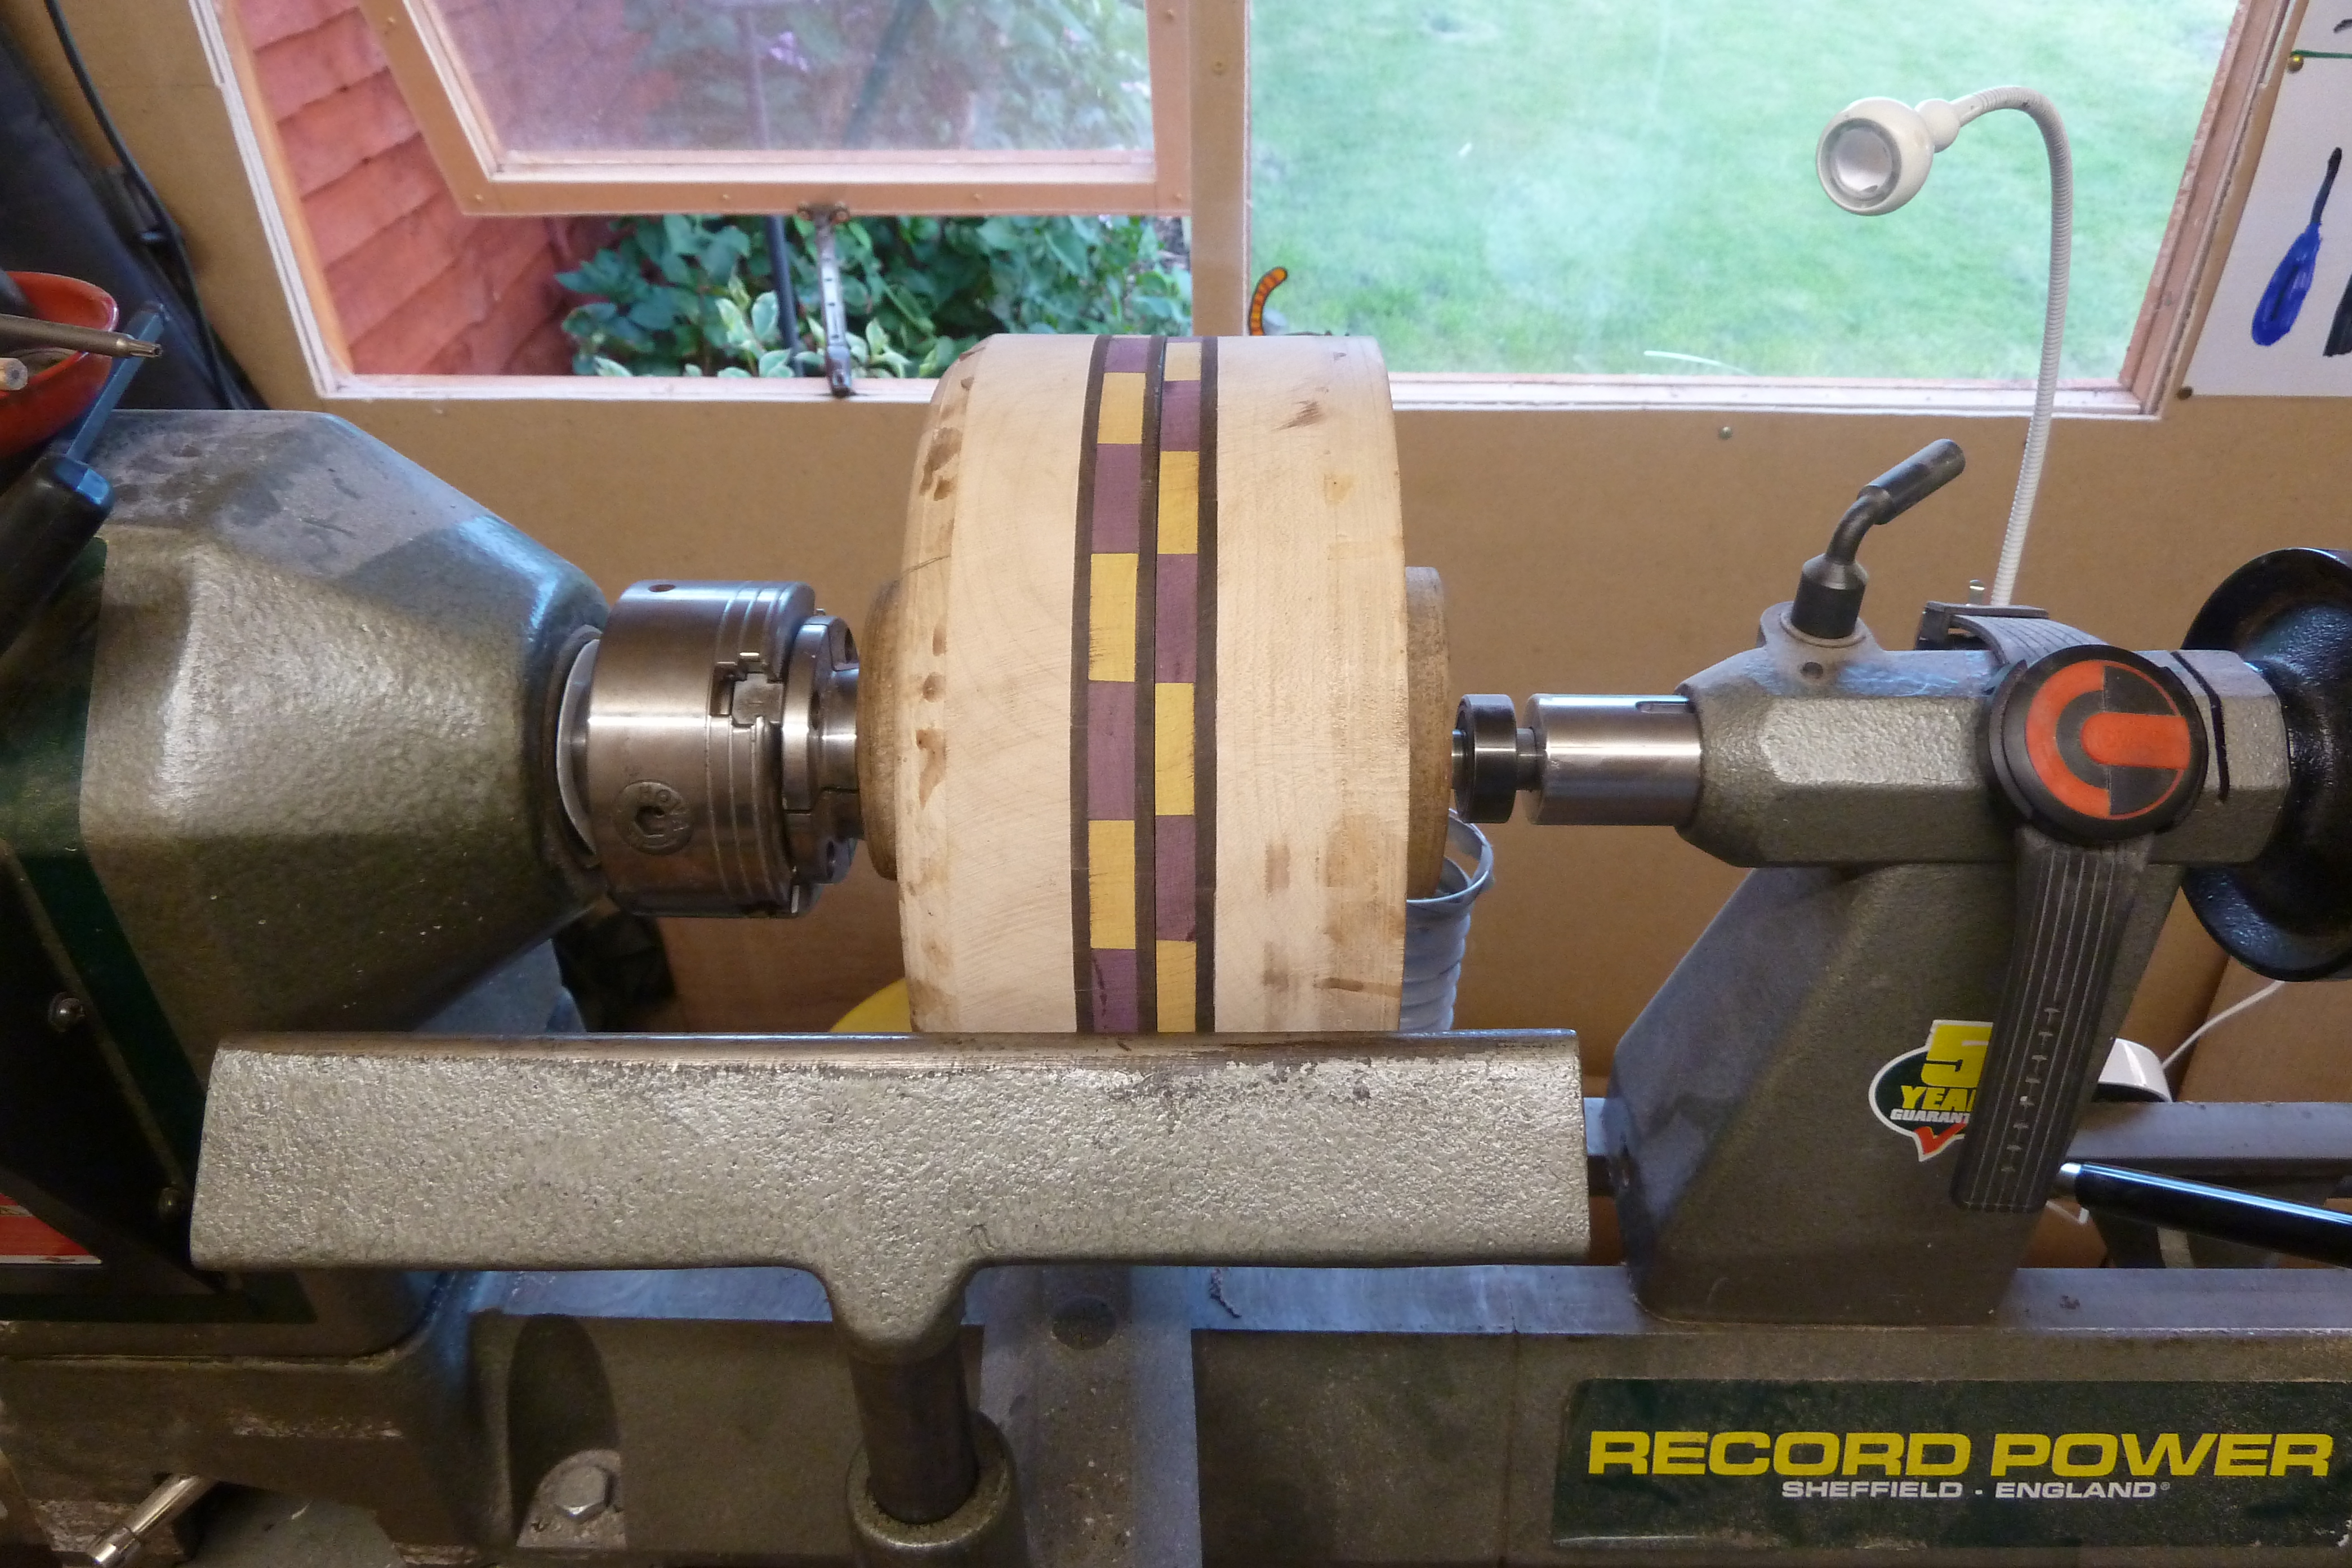
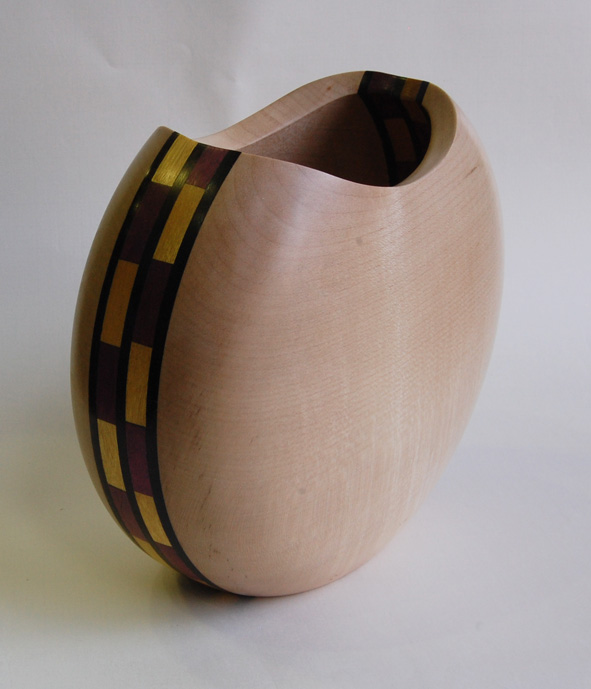
Right then, we are nearly there. Last main job was to cut the neck out of each bowl. I used a saucer to achieve the shape I wanted. Making sure the semi-circle was perfectly aligned to the top of the off-centre bowl – I drew the shape. I double checked the lines drawn match up perfectly when the bowls were placed back together.


Then it is off to the bandsaw. I tilted the table by about 30 degrees and then followed the lines on the cut. After a very nervous couple of cuts and a little bit of shaping with a sander, you should end up with a neck that looks like the below.
Once you are happy with the fit (too late if you are not!), it is time to glue the 2 halves together. I ground up the blackwood shavings I saved from earlier to dust and the mixed it with pva glue. This is to ensure you get “black” glue and therefore invisible. Then glued the 2 halves togther. Once dried, the last job is to create a flat base for the vase to stand on. This may seem like cheating, but I just popped the bottom of the vase on a sanding belt and let the tool do the hard work. As the base is the thickest part of the offcentred bowls, you can safely remove enough of the bowls/vase to make it stand up. A quick sand of the central segments around the outside to clear off any glue and then finish the outside with some wax and buffering – job done.
by Phil Bristow
Any issues, please use our email to contact us and we will be more than happy to help.
